Rotisserie Turkey Redemption: Spinning the Post‑Thanksgiving Bird to Juicy Perfection
How a simple spinner setup turned an extra holiday bird into crispy skin, juicy meat, and next‑level gravy. I put a second turkey on the rotisserie at 4pm after the main meal and let it spin until about 8pm—four hours of steady heat that blistered the skin and kept the meat unbelievably moist. Note: that four‑hour example reflects a mid/large bird and includes setup and resting time; at the commonly cited 10–15 minutes per pound a 10–14 lb turkey may finish sooner. Rely on internal temperature (target ~165°F in the thickest part, allowing for carryover) rather than a fixed clock window. Ready to rescue your leftovers? Read on to learn the exact setup, timing, and pro tricks for locking in moisture and producing crackling skin and gravy worth waking up for.
Why Spin a Post‑Thanksgiving Turkey?
The main meal is over, the table is cleared, and there’s still a whole turkey waiting in the fridge — the perfect setup for a relaxed, second‑act cook. Fire up the rotisserie in the late afternoon, settle in with a drink, and let the bird spin for about four hours; starting around 4pm and pulling at 8pm gives you a late, indulgent supper or a stash of superstar leftovers for the next day. It’s an easy, low‑stress way to turn post‑holiday fatigue into a crisp, aromatic centerpiece that smells like comfort and slow celebration.
Compared with oven roasting and smoking, rotisserie does a few things magic ovens can’t: the constant rotation promotes ultra‑even browning, the bird essentially self‑bastes as juices redistribute, and the skin renders down to a glassy, blistered crisp. That means the white meat — always the worry — comes out surprisingly succulent, and the dark meat gets that silky, pull‑apart tenderness. If you want crackling skin and breast meat that stays juicy instead of drying out, the spinner is your redemption.
There are practical perks beyond the flavor: the rotisserie’s drip pan collects concentrated drippings you can skim and reduce into an incredible gravy, and four hours of gentle rotation gives you an abundance of evenly cooked slices for sandwiches, pot pies, hash, and next‑day feasts. For best results, use a probe thermometer in the thickest part of the breast and aim to pull the bird when the probe reads roughly 160°F so carryover finishes it at a safe 165°F while it rests; reserve and degrease the pan juices, then simmer with a splash of stock and wine for glossy, intensely flavored gravy. Simple timing, a little patience, and that steady spin turn a leftover bird into the highlight of the week.
Setting Up the Spinner: Gear, Fire, and Bird Prep
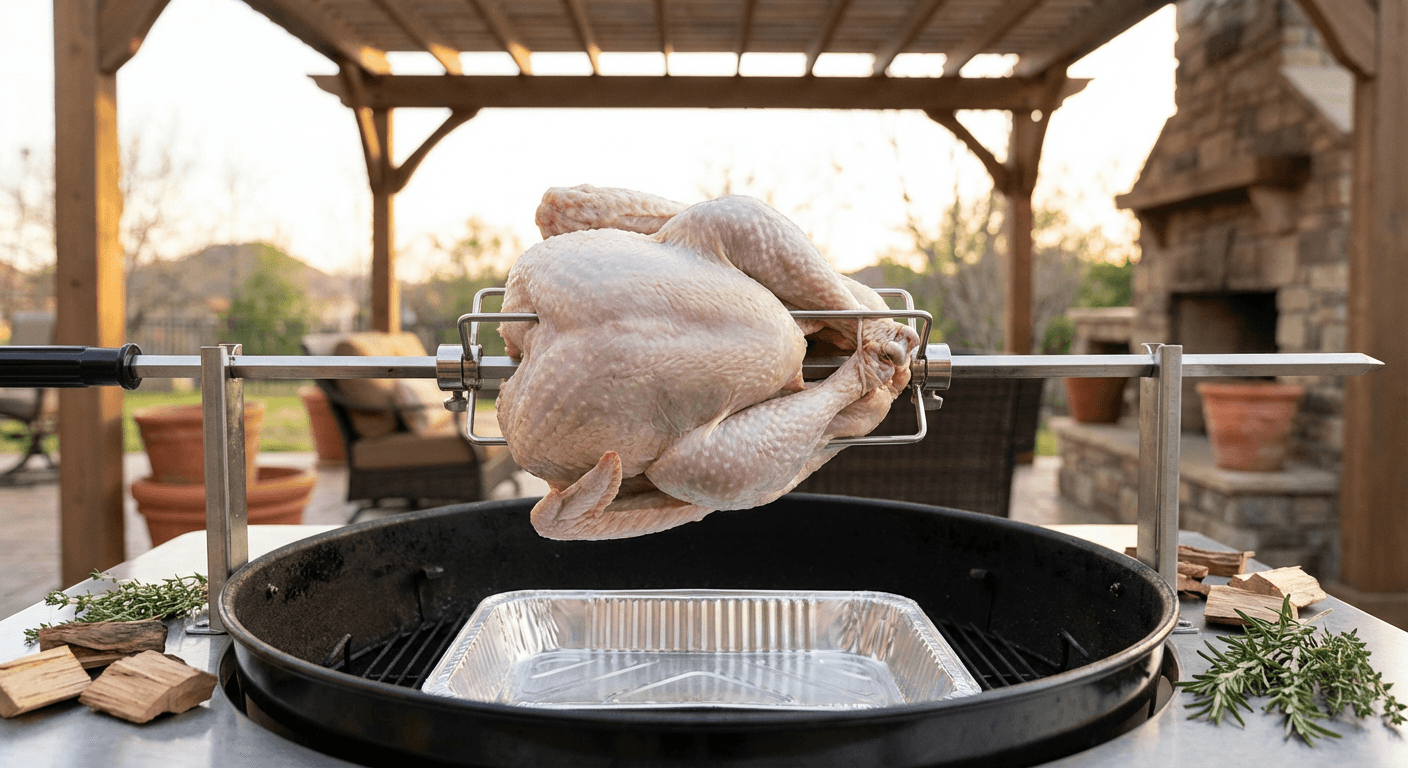
Start with the right kit and you’ve already won half the battle. At minimum you want a grill fitted with a rotisserie motor and a sturdy spit and forks that lock the bird in place; a counterweight or balancing clamp is a small investment that saves you drama. Add a shallow drip pan under the bird to catch juices (and make a killer gravy), and a reliable probe thermometer you can leave in the thickest part of the breast or thigh. For fuel, set up an indirect heat zone: on gas grills light the side burners and leave the center off, creating a hot, dry envelope that surrounds but doesn’t torch the turkey; on charcoal banks the coals to the sides or use charcoal baskets so the bird roasts in radiant heat rather than over live flames. Aim for a grate temperature around 325–375°F — steady, even heat will give you crisp, blistered skin without turning the meat into sawdust, and it's more important than obsessing over a single exact number.
Prep the bird to protect moisture and encourage great skin. A dry brine (salt rubbed under and over the skin and left overnight) tightens and seasons flesh while drying the skin for superior crisping; a wet brine gives maximum juiciness if you prefer classic soaking, then pat the bird bone‑dry before mounting. Let the turkey come close to room temperature for 30–60 minutes so it spins evenly and hits temperature more predictably. For skin finishing, keep it as dry as possible: blot with paper towels, then optionally dust a light coating of baking powder and kosher salt to promote blistering and deep color; brush lightly with oil rather than slathering butter, which can burn at rotisserie temperatures. Truss tightly — wings tucked and legs tied — center the bird on the spit, secure the forks, and test‑spin before you fire up to check balance; a slight wobble means extra wear on your motor and uneven cooking. These few mechanical and prep choices make the difference between a tired reheated bird and one that finishes on the spinner tasting and looking like it was roasted from scratch.
Juiciness Lock
For long rotisserie cooks, you can use either a low‑and‑slow approach (275–300°F) to gently render dark meat and lock moisture, or a moderate rotisserie temperature (325–350°F) for a faster cook with a finishing blast to crisp the skin. For either method, inject breasts and thighs with flavored butter or stock and keep a drip pan of broth and aromatics under the bird. Use a leave‑in probe thermometer to pull the breast at 155–160°F (rest 20–30 minutes for carryover to 165°F). If you start low, finish with higher heat for the last 10–15 minutes to crisp skin without drying the meat; if you cook at the moderate range, you can still finish hot for extra crispness.
Rotisserie Post‑Thanksgiving Turkey
A forgiving, hands‑off way to turn a post‑holiday turkey into a crisp‑skinned, juicy centerpiece using a rotisserie; includes a quick, smoky gravy made from the drippings.
Ingredients
- Whole turkey (10–14 lb preferred)10–14 lb
- Kosher salt2–3 tbsp
- Black pepper, freshly ground1–2 tsp
- Garlic powder1–2 tsp
- Onion powder1–2 tsp
- Neutral oil or melted ghee2–4 tbsp
- Fresh thyme and rosemary (optional)2–3 sprigs each
- Chicken or turkey stock (for drip pan and gravy)2–4 cups
- 2 tbsp butter and 2 tbsp flour (for a roux) OR 1–2 tbsp cornstarch (mixed with cold water as a slurry)2 tbsp butter and 2 tbsp flour, OR 1–2 tbsp cornstarch (slurry)
- Optional splash of wine or vinegar (for deglazing/brightening)1/4 cup
Steps
- 1
Pat the turkey dry and season it liberally inside and out with kosher salt, pepper, garlic powder, and onion powder at least 4 hours before cooking (or overnight for best flavor).
- 2
Rub the skin with neutral oil or melted ghee and tuck fresh herb sprigs into the cavity if using.
- 3
Plan your timeline so the turkey goes on the rotisserie around 4:00 pm and allow roughly 10–15 minutes per pound of cooking plus resting time for a 4:00–8:00 pm window.
- 4
Mid‑afternoon, set up the grill and rotisserie and position a drip pan beneath the spit, pouring in 2 cups of stock or water to catch drippings and stabilize heat.
- 5
Preheat the grill for indirect rotisserie cooking and stabilize the cooking zone at 325–350°F before mounting the bird.
- 6
Skewer the turkey onto the rotisserie spit, truss the legs, tuck the wings, and secure the forks so the bird is balanced and won’t wobble during rotation.
- 7
Start the rotisserie at around 4:00 pm and adjust burners or vents to maintain a steady 325–350°F with indirect heat over the drip pan.
- 8
Cook the turkey for roughly 10–15 minutes per pound while relying on the rotisserie’s rotation to self‑baste and crisp the skin.
- 9
Check the bird every 30–45 minutes for color and to confirm the grill temperature, making small burner or vent adjustments as needed to avoid flare‑ups and scorching.
- 10
Resist constant basting, which softens skin, and instead let the rotation do the work while the drip pan collects the fat and juices for gravy.
- 11
Use an instant‑read thermometer to monitor doneness and target a final safe internal temperature of 165°F (USDA). If you prefer to pull the breast slightly earlier to allow carryover, remove it at 160–162°F only if you use a leave‑in probe and rest the bird long enough (typically 15–30 minutes) so the breast rises to 165°F; check thighs and cook them to at least 165°F (many prefer about 175°F for more tender dark meat).
- 12
When target temperatures are reached, turn off the heat, remove the turkey from the spit, and transfer it to a cutting board to rest loosely tented for 20–30 minutes.
- 13
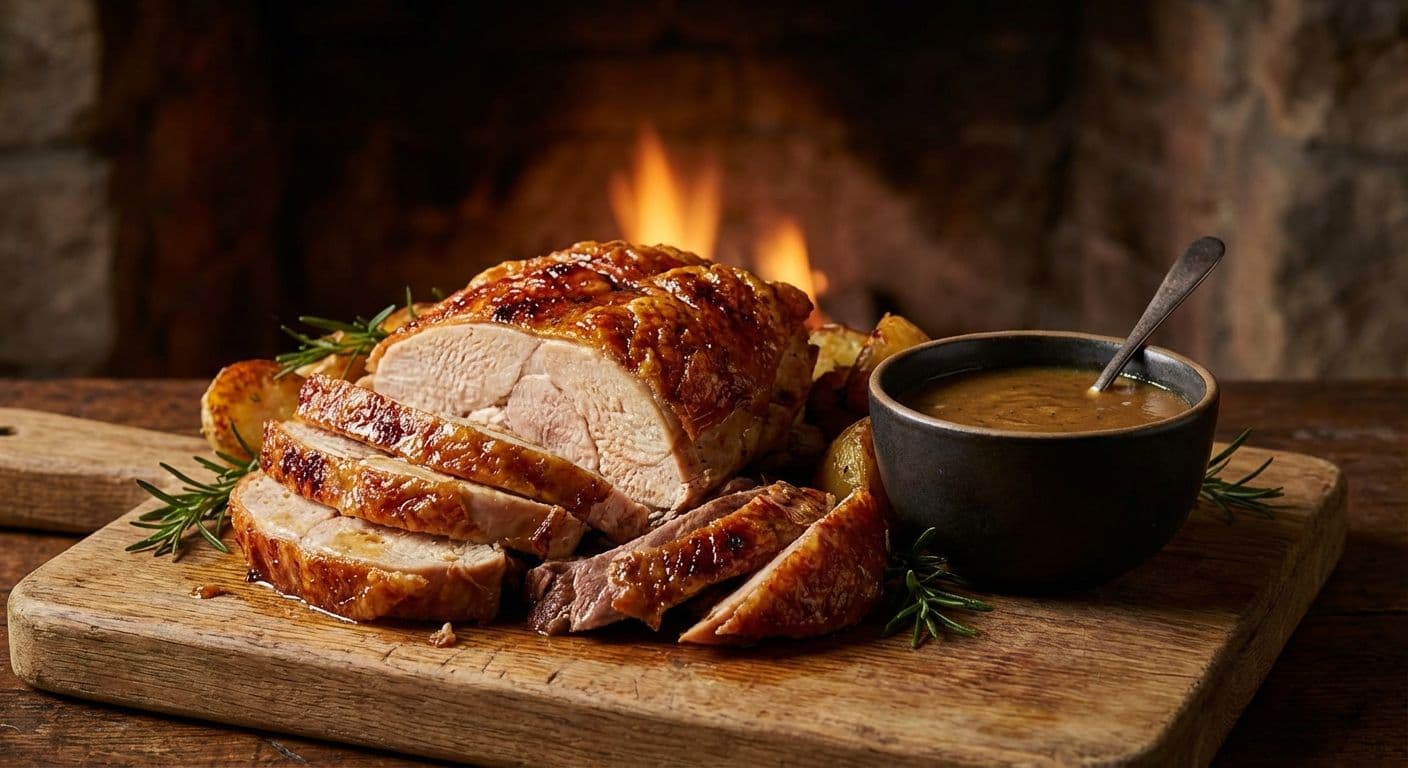
After resting, carve the turkey by slicing the breast into even pieces and separating the dark meat from the thighs and legs to showcase juiciness and texture.
- 14
For quick gravy, pour the drip pan juices into a fat separator or a bowl and remove excess fat from the top.
- 15
Place the de‑greased drippings and any browned bits in a saucepan, add 1–2 cups of stock or a splash of wine, and bring to a simmer while scraping the fond.
- 16
Whisk in a quick roux made from 2 tbsp butter and 2 tbsp flour or stir in a cornstarch slurry until the gravy thickens to your preferred consistency.
- 17
Taste and season the gravy with salt, pepper, and a small splash of vinegar or soy sauce to brighten the deep, smoky flavors, then strain if desired and serve warm.
A forgiving, hands‑off way to turn a post‑holiday turkey into a crisp‑skinned, juicy centerpiece using a rotisserie; includes a quick, smoky gravy made from the drippings.
Ingredients
- Whole turkey (10–14 lb preferred)10–14 lb
- Kosher salt2–3 tbsp
- Black pepper, freshly ground1–2 tsp
- Garlic powder1–2 tsp
- Onion powder1–2 tsp
- Neutral oil or melted ghee2–4 tbsp
- Fresh thyme and rosemary (optional)2–3 sprigs each
- Chicken or turkey stock (for drip pan and gravy)2–4 cups
- 2 tbsp butter and 2 tbsp flour (for a roux) OR 1–2 tbsp cornstarch (mixed with cold water as a slurry)2 tbsp butter and 2 tbsp flour, OR 1–2 tbsp cornstarch (slurry)
- Optional splash of wine or vinegar (for deglazing/brightening)1/4 cup
Steps
- 1
Pat the turkey dry and season it liberally inside and out with kosher salt, pepper, garlic powder, and onion powder at least 4 hours before cooking (or overnight for best flavor).
- 2
Rub the skin with neutral oil or melted ghee and tuck fresh herb sprigs into the cavity if using.
- 3
Plan your timeline so the turkey goes on the rotisserie around 4:00 pm and allow roughly 10–15 minutes per pound of cooking plus resting time for a 4:00–8:00 pm window.
- 4
Mid‑afternoon, set up the grill and rotisserie and position a drip pan beneath the spit, pouring in 2 cups of stock or water to catch drippings and stabilize heat.
- 5
Preheat the grill for indirect rotisserie cooking and stabilize the cooking zone at 325–350°F before mounting the bird.
- 6
Skewer the turkey onto the rotisserie spit, truss the legs, tuck the wings, and secure the forks so the bird is balanced and won’t wobble during rotation.
- 7
Start the rotisserie at around 4:00 pm and adjust burners or vents to maintain a steady 325–350°F with indirect heat over the drip pan.
- 8
Cook the turkey for roughly 10–15 minutes per pound while relying on the rotisserie’s rotation to self‑baste and crisp the skin.
- 9
Check the bird every 30–45 minutes for color and to confirm the grill temperature, making small burner or vent adjustments as needed to avoid flare‑ups and scorching.
- 10
Resist constant basting, which softens skin, and instead let the rotation do the work while the drip pan collects the fat and juices for gravy.
- 11
Use an instant‑read thermometer to monitor doneness and target a final safe internal temperature of 165°F (USDA). If you prefer to pull the breast slightly earlier to allow carryover, remove it at 160–162°F only if you use a leave‑in probe and rest the bird long enough (typically 15–30 minutes) so the breast rises to 165°F; check thighs and cook them to at least 165°F (many prefer about 175°F for more tender dark meat).
- 12
When target temperatures are reached, turn off the heat, remove the turkey from the spit, and transfer it to a cutting board to rest loosely tented for 20–30 minutes.
- 13
After resting, carve the turkey by slicing the breast into even pieces and separating the dark meat from the thighs and legs to showcase juiciness and texture.
- 14
For quick gravy, pour the drip pan juices into a fat separator or a bowl and remove excess fat from the top.
- 15
Place the de‑greased drippings and any browned bits in a saucepan, add 1–2 cups of stock or a splash of wine, and bring to a simmer while scraping the fond.
- 16
Whisk in a quick roux made from 2 tbsp butter and 2 tbsp flour or stir in a cornstarch slurry until the gravy thickens to your preferred consistency.
- 17
Taste and season the gravy with salt, pepper, and a small splash of vinegar or soy sauce to brighten the deep, smoky flavors, then strain if desired and serve warm.
"Four hours on the spinner turned a tired, post‑holiday bird into a glossy mahogany showstopper—skin crackling, juices trembling in the cavity. Carving released hot drippings that slicked mashed potatoes and yorkshire puddings, each slice exhaling steam and a rush of savory, buttery flavor; dark meat pulled apart like velvet while the white stayed unbelievably moist. Stay up late for this one—the wait, the sizzle, the first forkful of dripping, perfectly seasoned meat is the kind of payoff that makes every extra hour worth it."